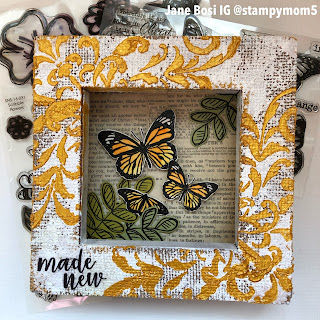
Hello, Sweet Friends! Today, I'm sharing this easy peasey reverse canvas with a tutorial!! It features the stamp sets from Sweet 'N Sassy Stamps, Made New and Scribble Flowers. By the way, when you shop from this post, you are using my affiliate links. I appreciate your support!
You will need:
a canvas--mine measures 6x6
burlap
paint or gesso
embossing paste or modeling cream
Mog Podge
stamps, paper and ink
coloring tools
decorative
tissue paper
bible page or patterned paper
You'll have great luck piecing things together if you bevel each end. Let it dry completely; overnight if possible.
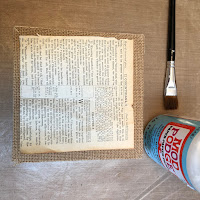
Next, trim a piece of patterned paper or a bible page to fit inside the canvas.
You'll want to apply mod podge to both the paper/page and the bottom of the canvas. Insert the paper, quickly moving it into position. You can use your heat gun to speed up the drying process for this step.
Next, cover the burlap frame with paint or gesso. This creates a cool shabby look!
Let the paint or gesso dry completely. I got a little excited and placed my butterflies in the center--I would recommend you wait until the last step--see below.
Using modeling paste (mine is gold) or embossing paste and your stencil, add a design to the frame.
Stamp your sentiment on tissue paper and trim as close to the image as possible
The tissue paper will become virtually invisible when you mod podge it to your frame. Be sure to pick a spot that has solid coverage of paint/gesso. Lay down a layer of mod podge, then the tissue paper sentiment, and another layer of mod podge on the top. Let this dry completely.
THIS is the step where you stamp, color and trim your images. Arrange the images in a pleasing way and......
BOOM! Your work of art is complete!
TTFN, Jane


Very nice. Love using the canvas in reverse.
ReplyDelete