
The team at Sweet N Sassy Stamps is hosting a stamp-a-thon for our VIP's this weekend to celebrate Korin's birthday!! And, to provide some encouragement and fun in our stamping community. Why not come and play along? You'll find our group by searching Facebook for Sweet N Sassy Stamps VIP group or just click on the link and join!!
🥳
Play along and you could win 1 of 5 $10 gift codes to the Sweet N Sassy Stamps store. To enter, upload your creations in our stamp-a-thon album which can be found under the announcements. (Here is the link, also:https://www.facebook.com/media/set/?set=oa.2960770237322890&type=3.)
You will receive one entry per project. You do not have to use Sweet N Sassy Stamps products to join the fun, but we sure would love it if you did. 😁🥰 You may combine challenges but you will only receive one entry per project.
The deadline to enter for the giveaway is Saturday, April 11th. Winners will be chosen and announced, in the VIP group, by Monday, April 13th. This is open to international players, as well.
The deadline to enter for the giveaway is Saturday, April 11th. Winners will be chosen and announced, in the VIP group, by Monday, April 13th. This is open to international players, as well.
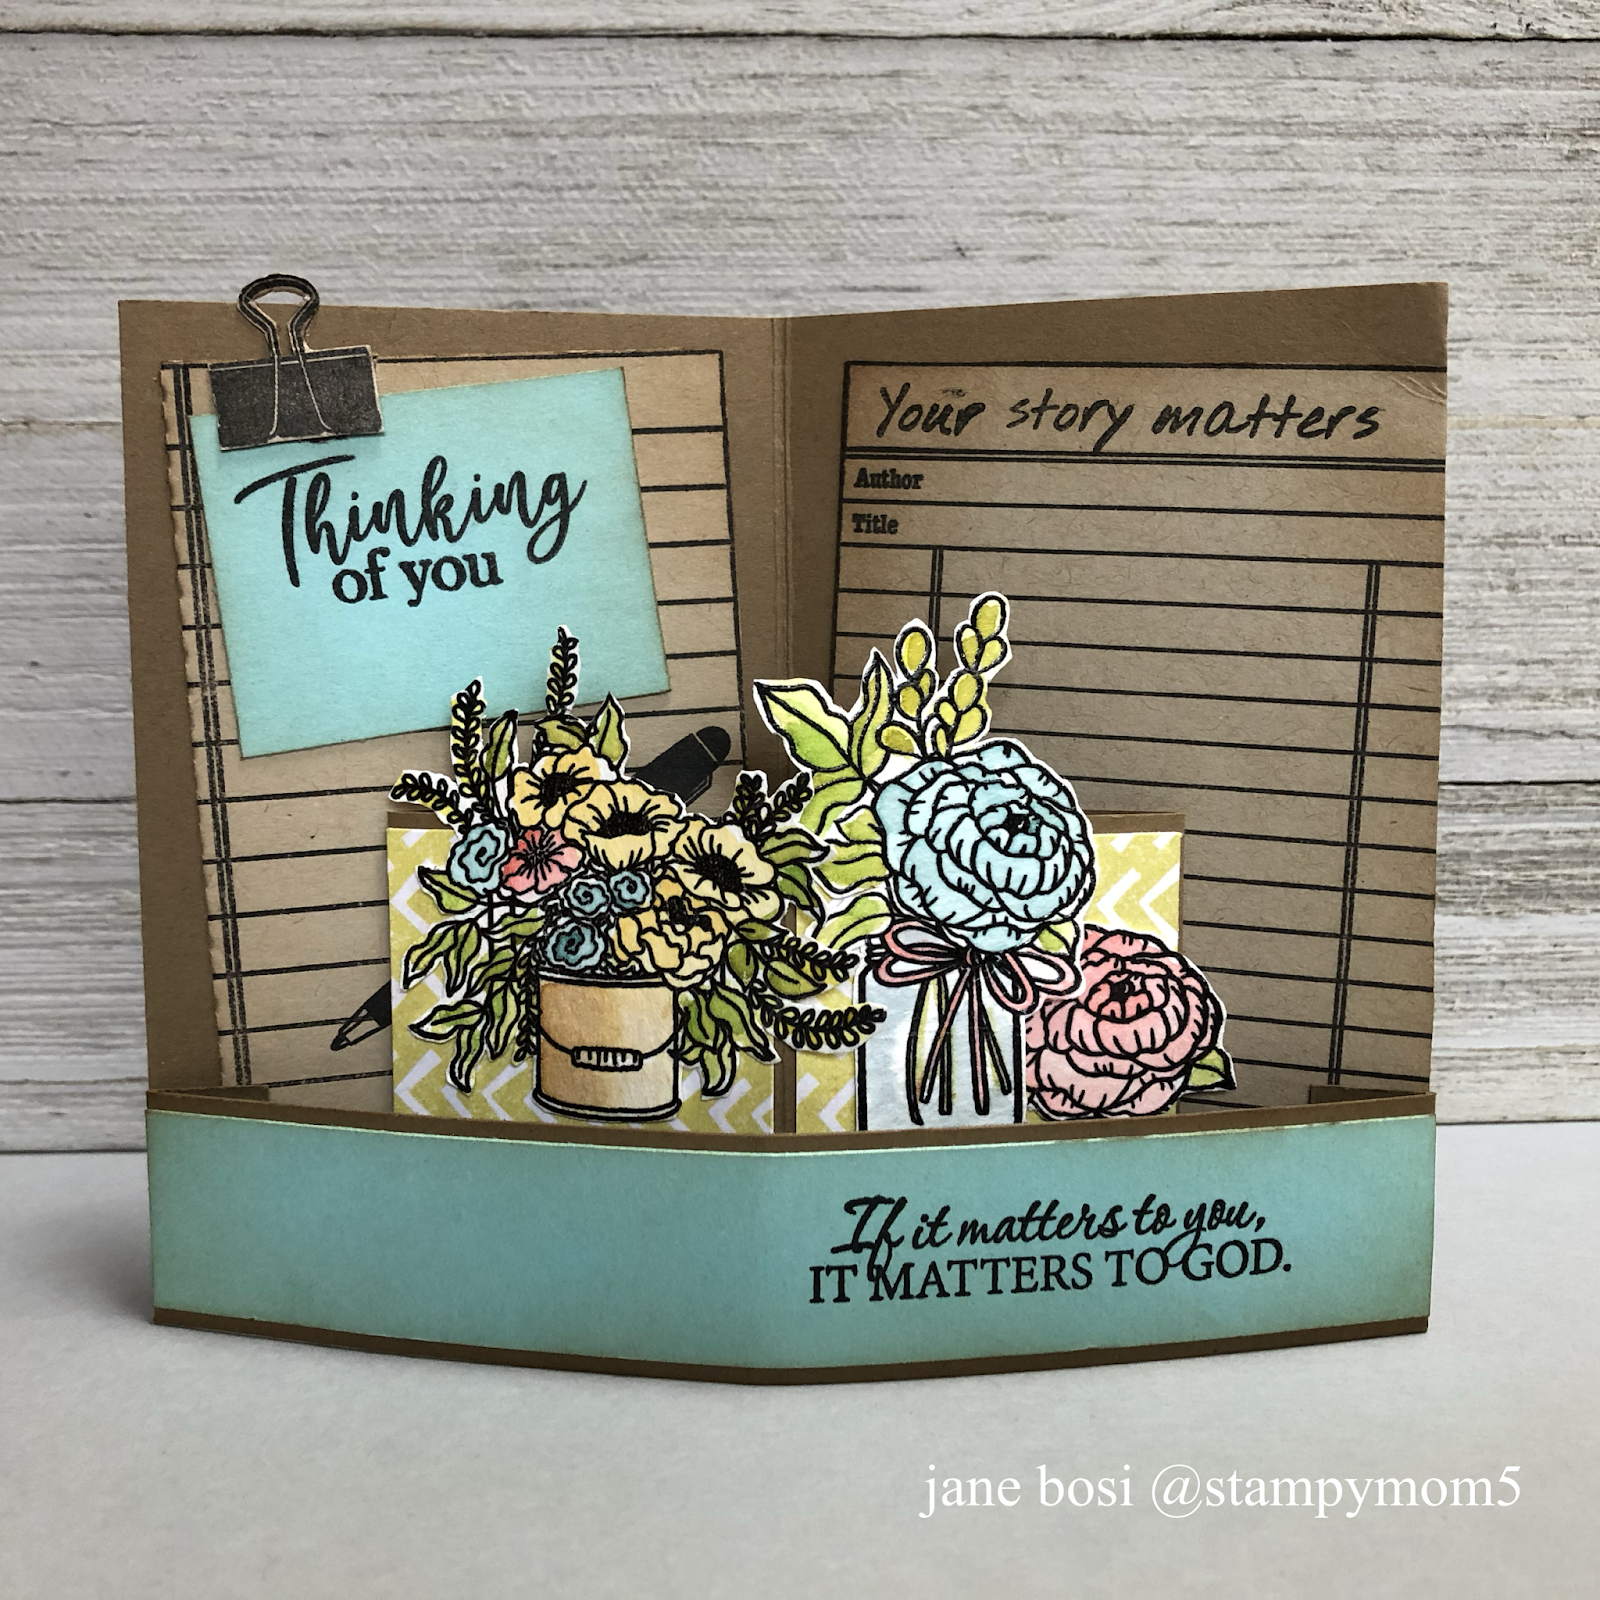
My challenge is the Quarter Panel 3D card that became popular this year. This is not my original idea. I am, however, sharing the tutorial I filmed and wrote for all of you!!
You will need three pieces of cardstock for basic foundation of the card: the base measures 4.25" x 5.5", the pop out piece measures 2" x 4.5" and the sentiment strip measures 1" x 6.5".
You will need three pieces of cardstock for basic foundation of the card: the base measures 4.25" x 5.5", the pop out piece measures 2" x 4.5" and the sentiment strip measures 1" x 6.5".

Additional items you'll need: adhesive, stamps, additional card stock, patterned paper or other embellishments.

Score the base card stock in half (along the 5.5" side) at 2 3/4"

Score the pop out piece along the 4.5" side at .5", 2 1/4" and 4"

Score the sentiment piece along the 6.5" side at .5" and 6".

Decorate all three pieces as desired. I'm using images from the April SNSS release, Your Story and Country Garden, as well as an older set, Be Encouraged. Place adhesive on the end flaps of both the pop out piece and sentiment piece.


The next step is to adhere the pop out piece to the base. I've zoomed in so you can see how the scored lines in the middle of each piece line up exactly. Expose the adhesive on each flap, line up the scores and adhere so that the pop out piece is flat to the base.

When you fold the base in half, the dimensional piece naturally pops right out!

In a similar way, add your sentiment piece.

Make any necessary adjustments--see how my Thinking of You, originally ended up being too low? I solved that by adding a different sentiment piece and one of the cool embellishment clips from Your Story.
I'm wishing the happiest of birthdays to Korin and hope you all are having a blast hanging out and crafting with us!
Thinking of you--Jane
Thinking of you--Jane
No comments:
Post a Comment